Request a new Debtor
All new Debtor requests are to be submitted to our Operations Team (operations@acceleratedpayments.com) and/or your Relationship Manager.
Once the request is received, an initial review will be completed to determine viability e.g. insurance limits, industry, etc.
Any communication regarding a new Debtor request will come via email and/or phone calls.
View Debtor Information
The Debtors page provides a detailed view of your debtor portfolio, allowing you to review balances, payment history, ageing information, performance metrics, notes, and supporting documents for individual debtors.
Access the page by selecting Debtors from the left-hand navigation menu.
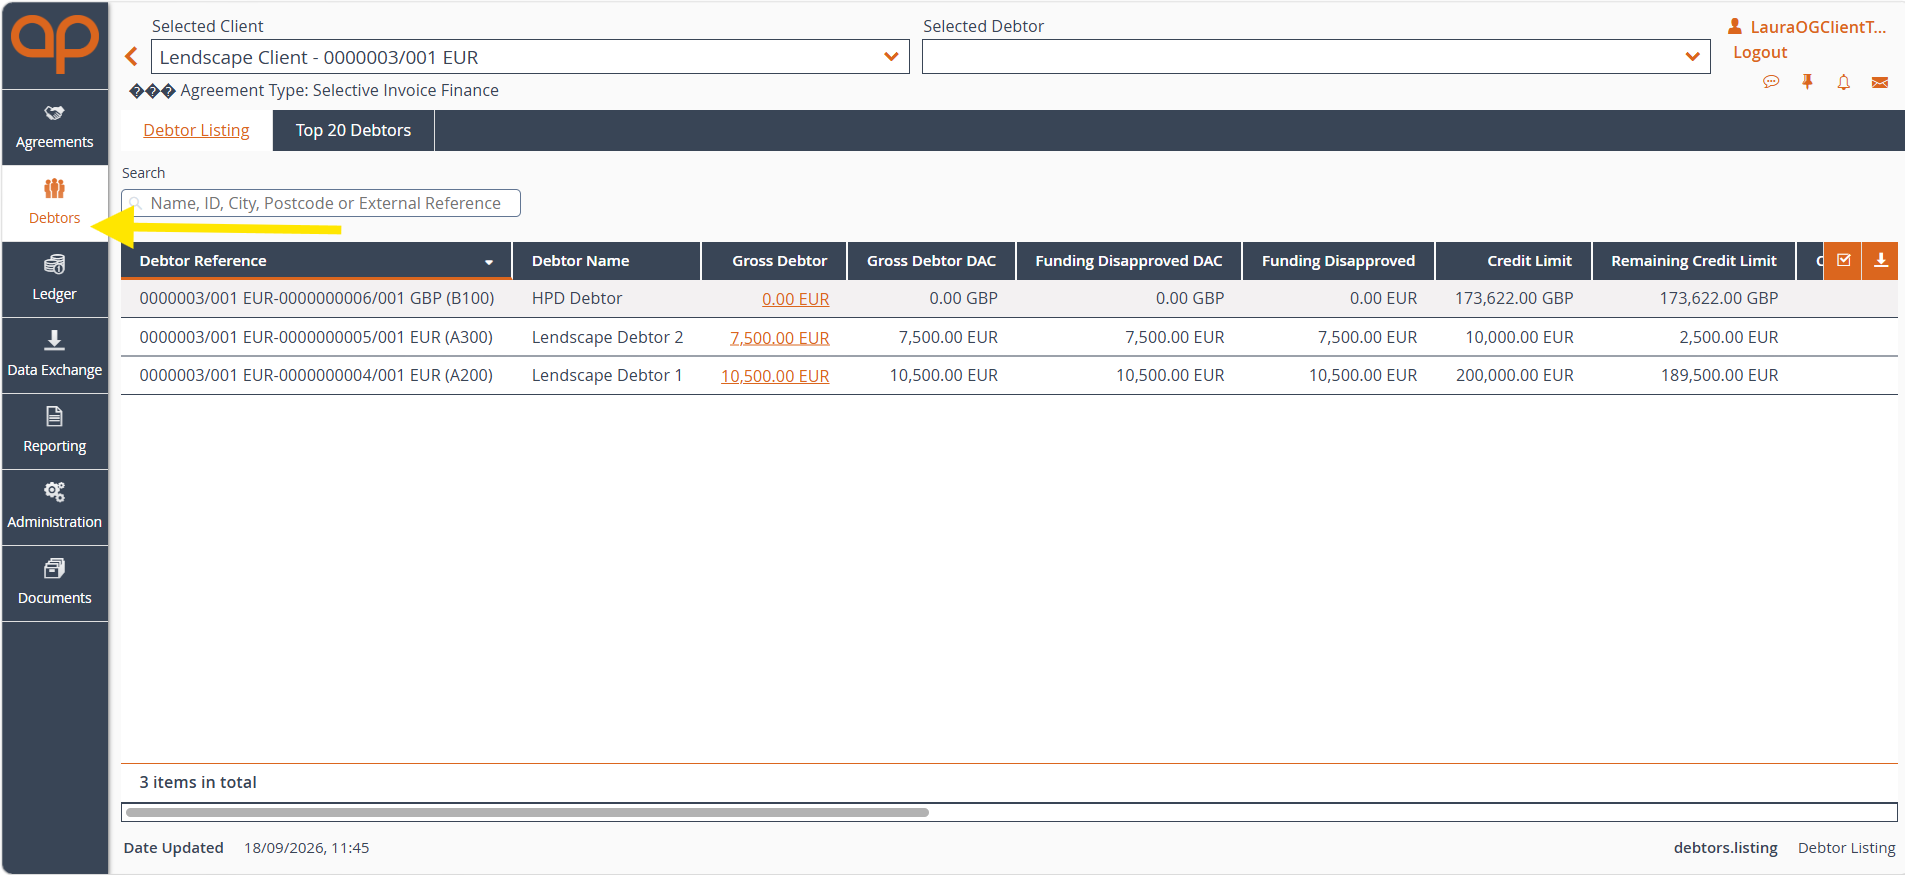
Step 1: Select your client and debtor
At the top of the page, use the dropdown menus to select:
- Selected Client (top left) to choose the client account you wish to view.
- Selected Debtor (top right) to choose the specific debtor associated with that client.
Once selected, the page will refresh to display information relating to the chosen debtor.
Step 2: Review the Debtor Summary
The Debtor Summary tab illustrated above provides an at-a-glance overview of your selected debtor.
Here you can view:
Like the Agreement Dashboard, the page can be customised using the Widget icon to add, remove or rearrange information panels to suit your preferences.
Step 3: View Debtor Movements
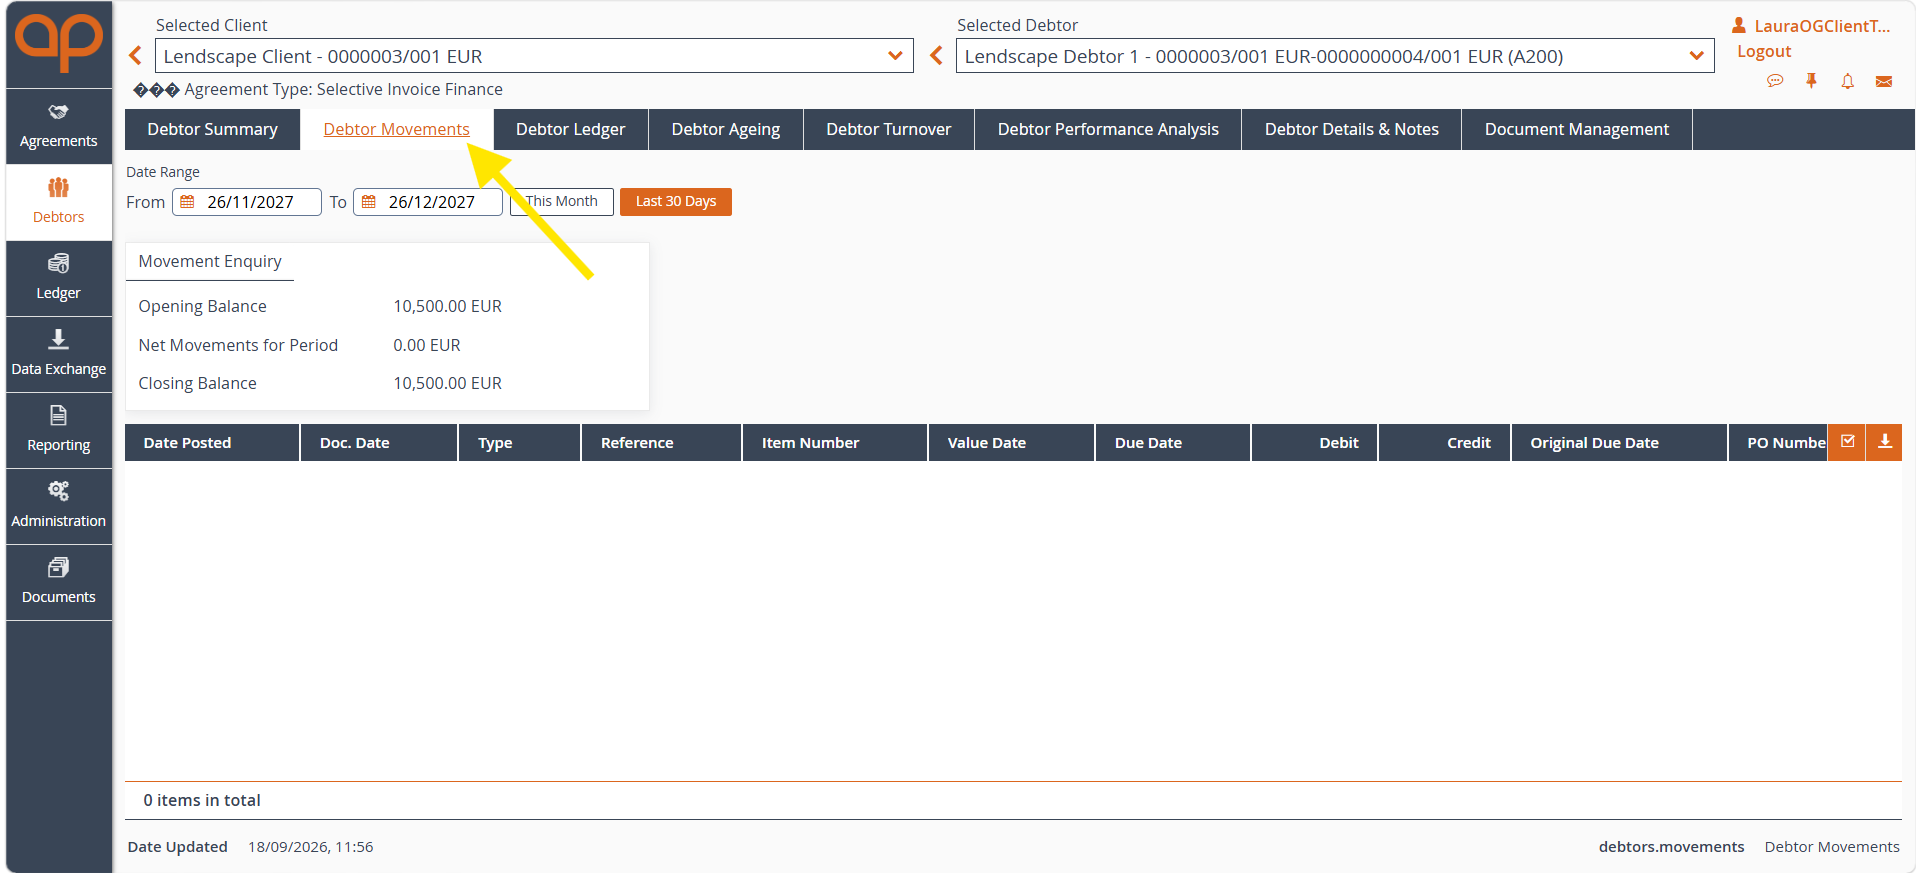
Select Debtor Movements to review changes in a debtor's balance over a selected period.
This tab shows:
Use the date filters to focus on a specific timeframe or select a quick filter such as This Month or Last 30 Days.
What is this used for?
Debtor Movements helps you understand how a debtor's balance has changed over time and identify any recent activity affecting their account.
Step 4: Review the Debtor Ledger
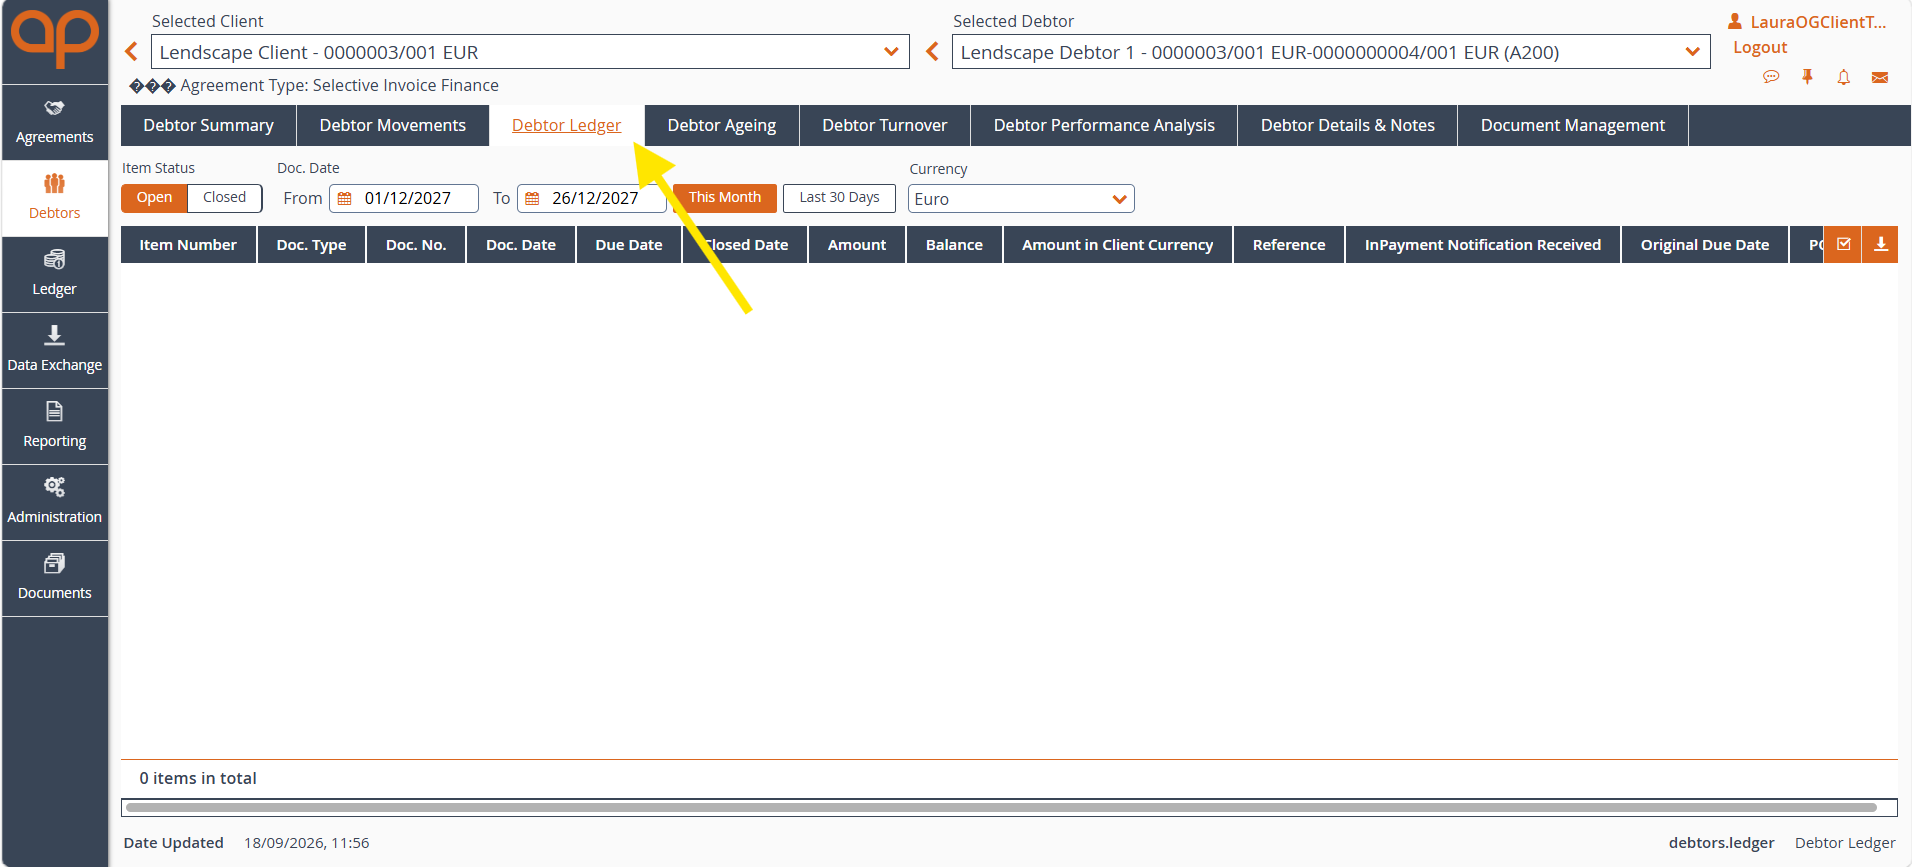
Select Debtor Ledger to view a detailed list of transactions relating to the selected debtor.
The ledger includes information such as:
Use the available filters to narrow your search by date range, currency or item status.
What is this used for?
The Debtor Ledger provides a complete transaction history, making it easy to review individual invoices and outstanding balances.
Step 5: Analyse Debtor Ageing
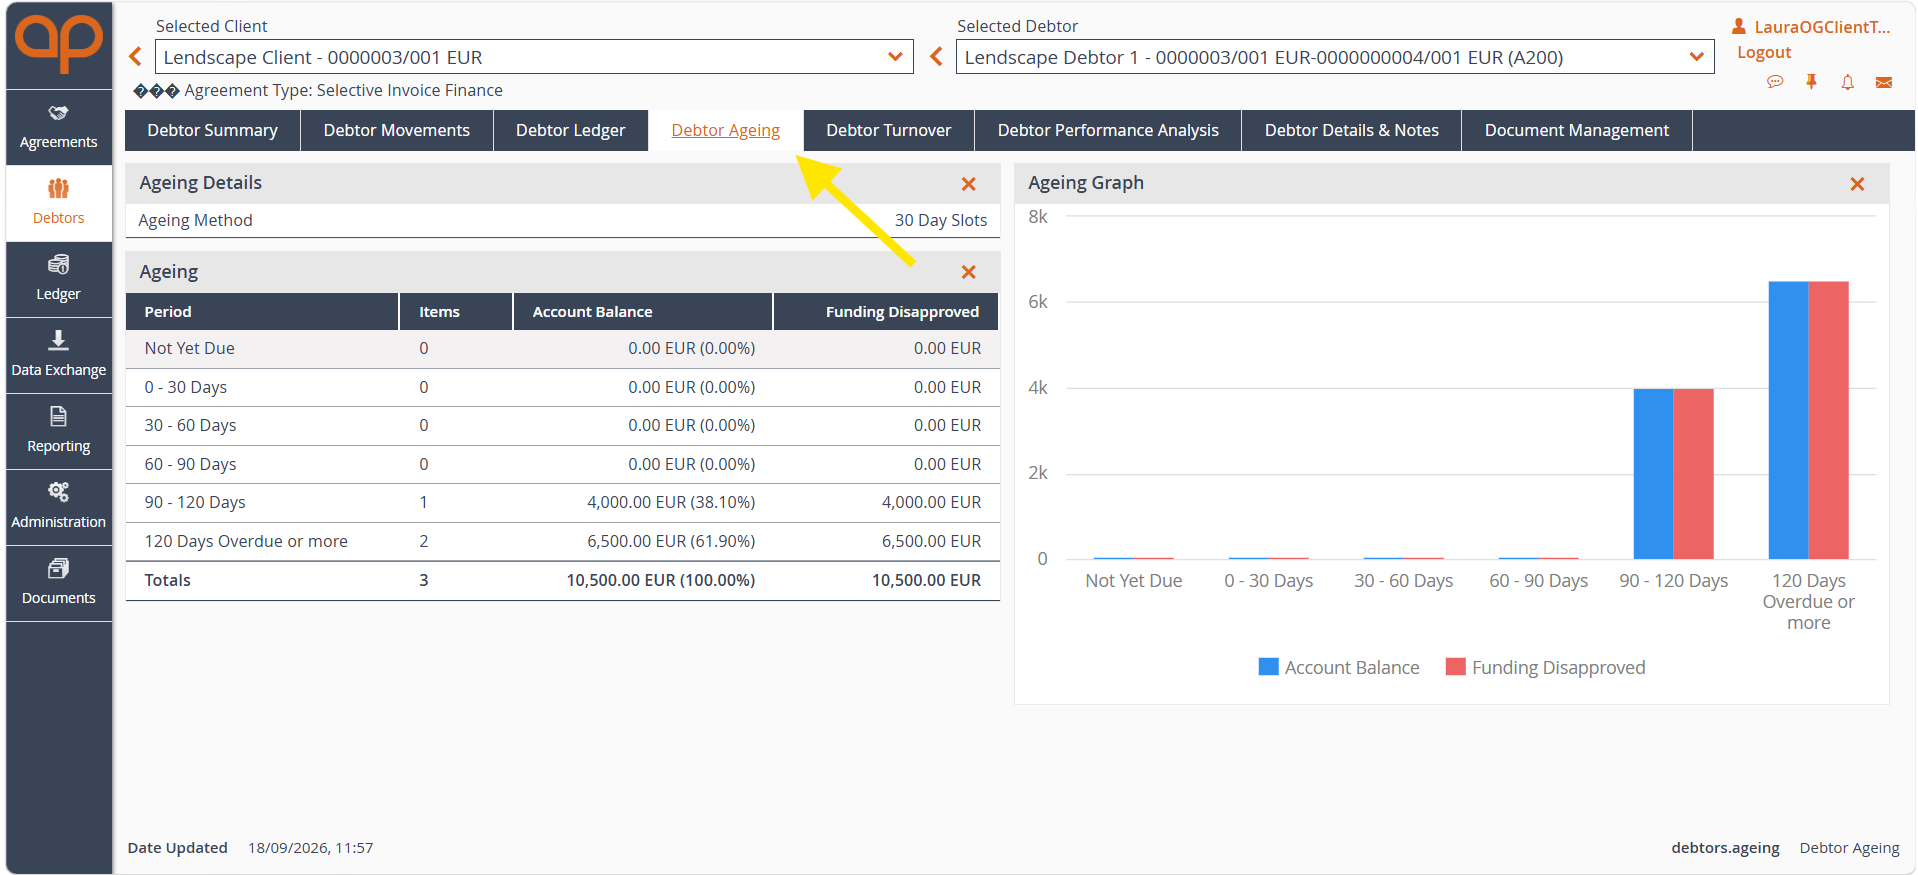
Select Debtor Ageing to see how outstanding debt is distributed across ageing periods.
The page displays:
What is this used for?
Debtor Ageing helps identify overdue debt and highlights payment trends that may require attention.
Step 6: Review Debtor Turnover
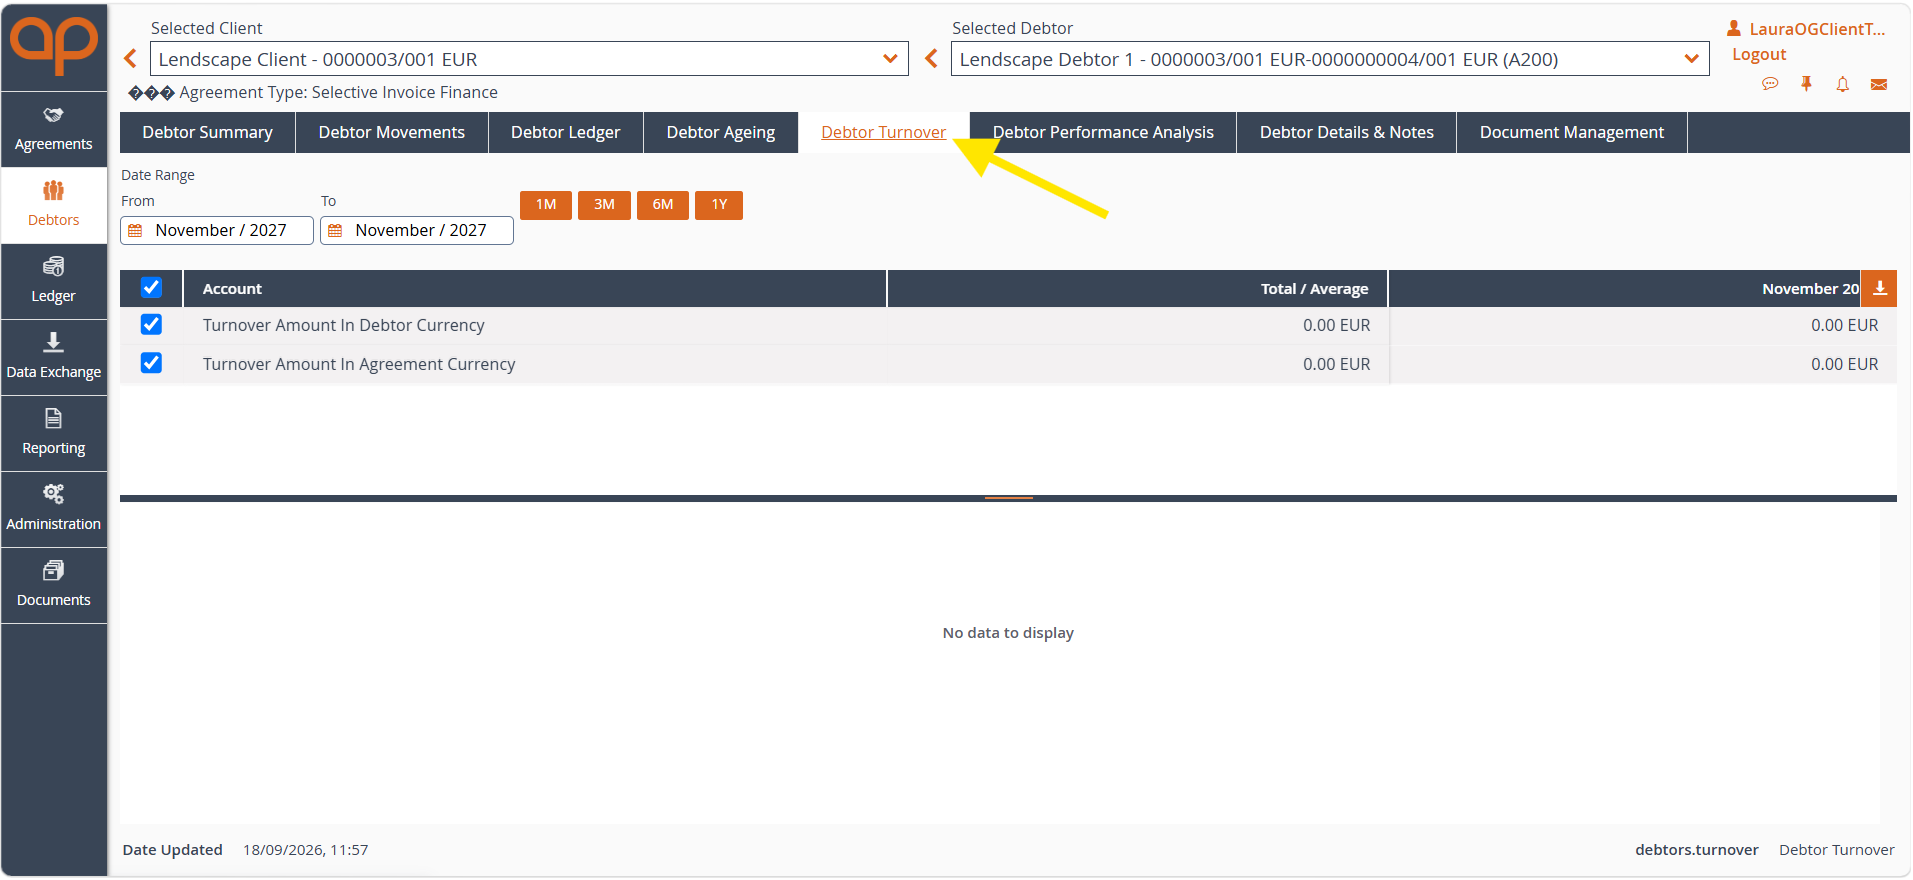
Select Debtor Turnover to view turnover activity for the selected debtor.
This section allows you to:
Quick date selection options such as 1M, 3M, 6M and 1Y are available.
What is this used for?
Debtor Turnover helps you understand sales activity and trading volumes associated with a debtor over time.
Step 7: View Debtor Performance Analysis
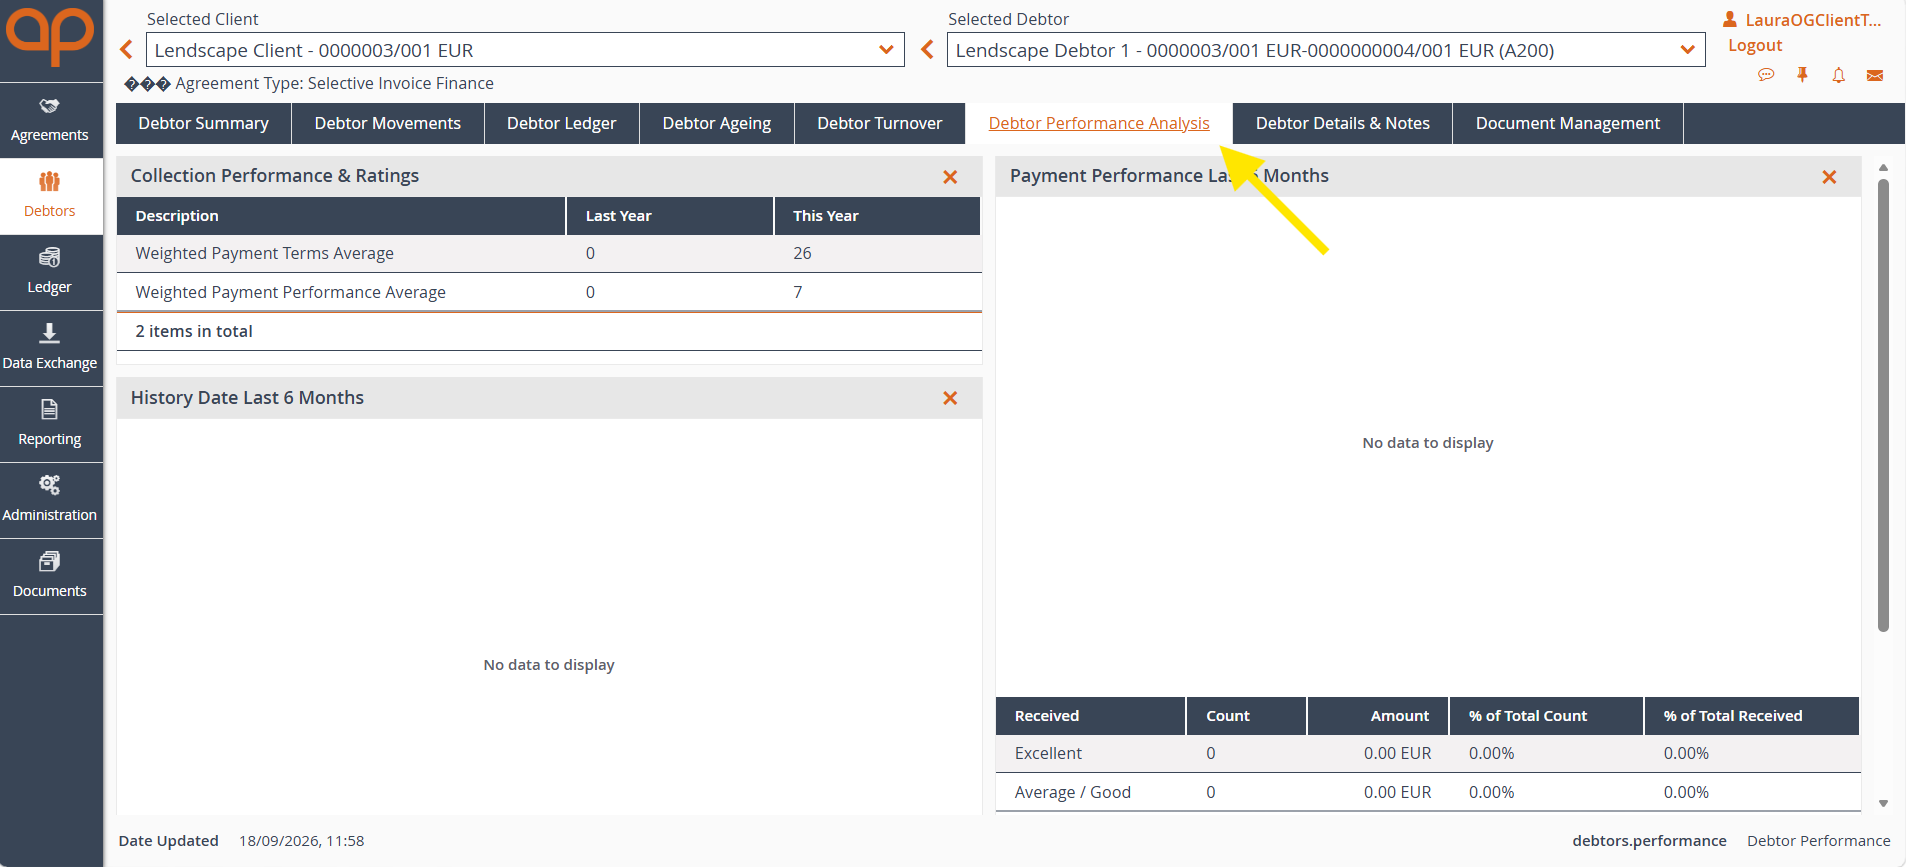
Select Debtor Performance Analysis to review payment and collection performance metrics.
Information available may include:
What is this used for?
Debtor Performance Analysis helps assess how reliably a debtor pays and provides insight into overall payment behaviour.
Step 8: Manage Debtor Details and Notes
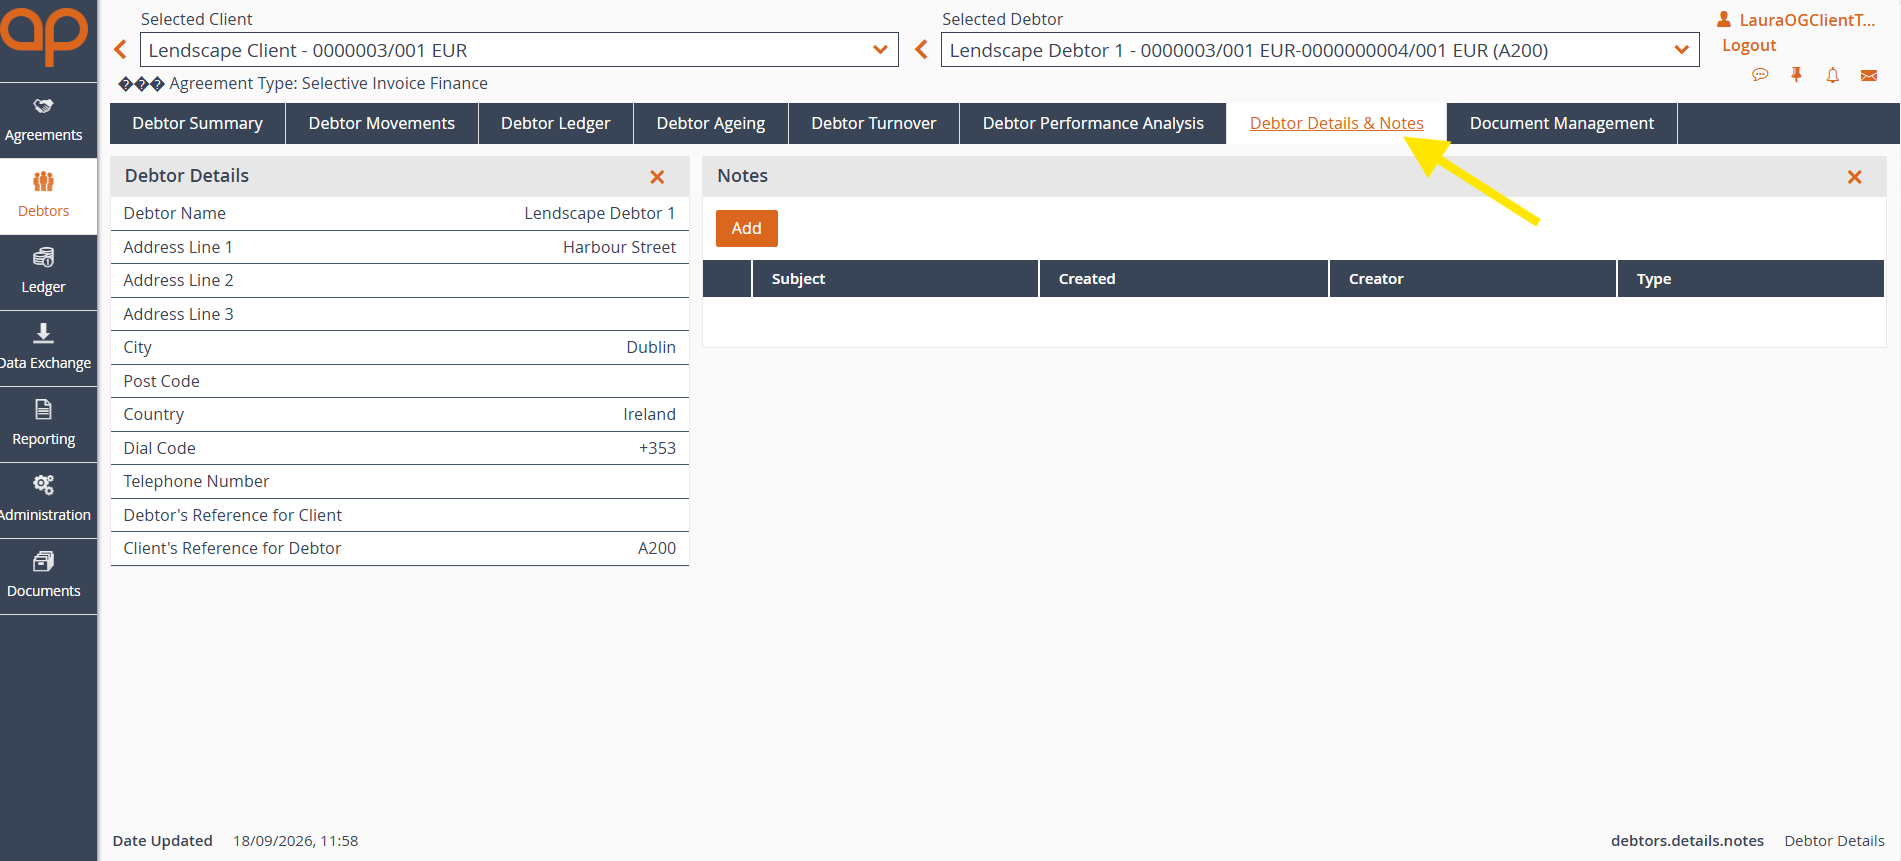
Select Debtor Details & Notes to view and maintain debtor records.
This section contains:
To add a note, select Add and enter the required information.
What is this used for?
This area allows users to maintain useful debtor information and record notes that may assist with account management and future reviews.
Step 9: Access Document Management
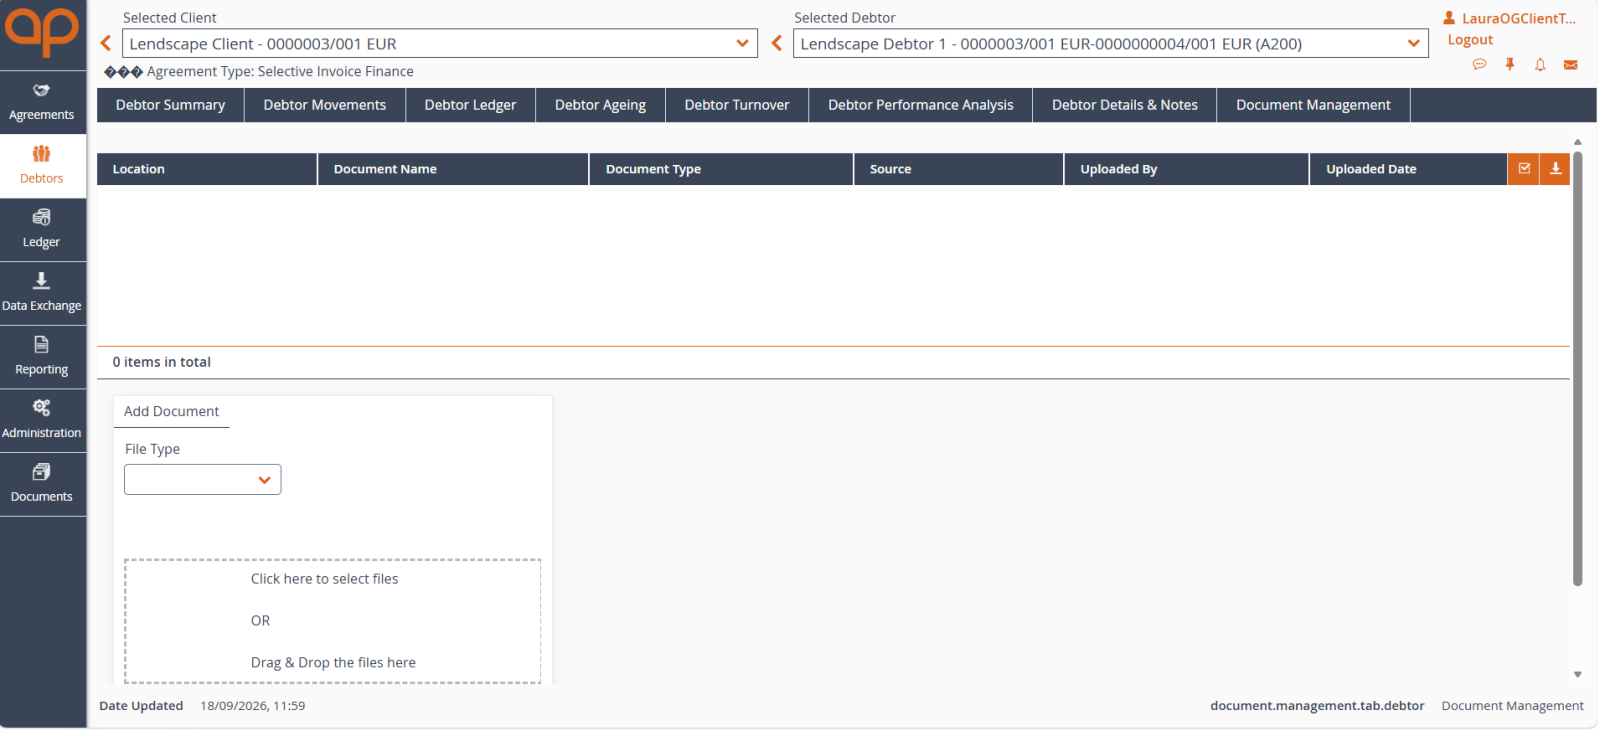
Select Document Management to view or upload documents relating to the selected debtor.
From this page you can:
- View previously uploaded documents
- Download available files
- Upload new documents
- Categorise documents by file type
What is this used for?
Document Management provides a central location for storing and accessing debtor-related documentation.
Was this article helpful?
That’s Great!
Thank you for your feedback
Sorry! We couldn't be helpful
Thank you for your feedback
Feedback sent
We appreciate your effort and will try to fix the article