The Ledger section allows you to track the status and lifecycle of invoices submitted through Halo. It provides visibility of invoice activity from submission through to settlement, helping you monitor funding and processing status.
Access the page by selecting Ledger from the left-hand navigation menu.
Step 1: Select your client and debtor
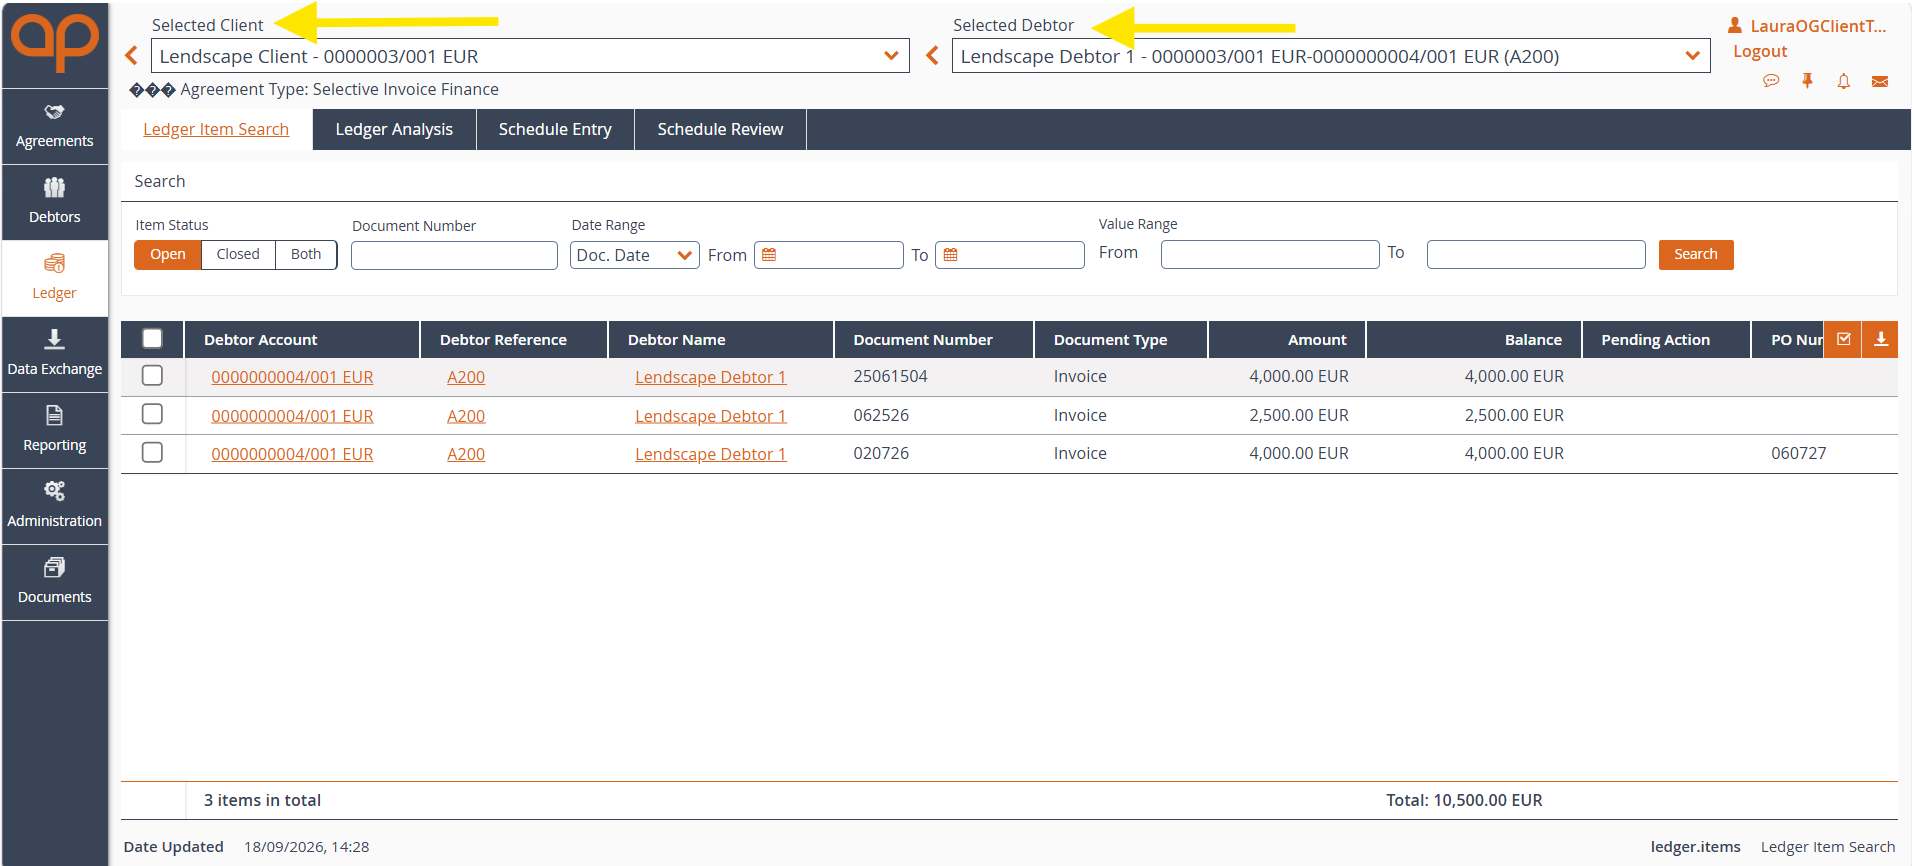
At the top of the page, use the dropdown menus to select:
- Selected Client (top left) to choose the client account you wish to view.
- Selected Debtor (top right) to filter information relating to a specific debtor.
Once selected, the information displayed throughout the Ledger section will update accordingly.
Step 2: Search for invoice items
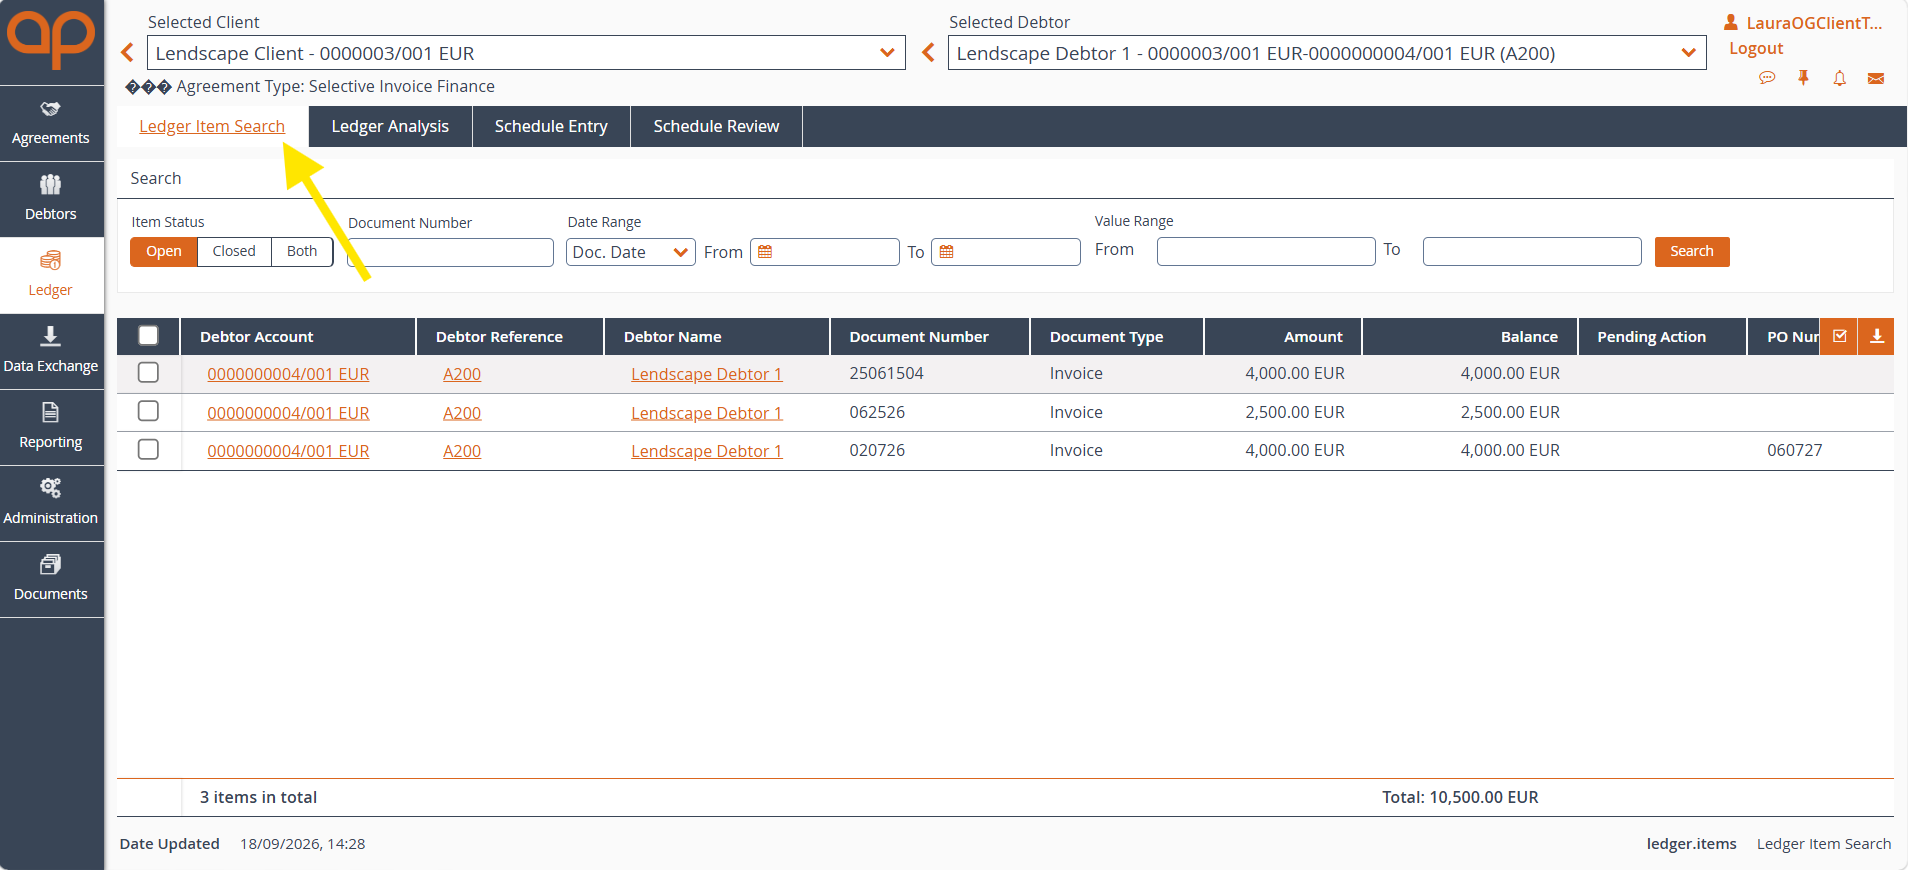
Select the Ledger Item Search tab to search for individual invoices and ledger items.
From this page you can:
- Search open, closed or all items.
- Search by document number.
- Filter by date range.
- Filter by value range.
- Filter by currency.
The results table displays information such as:
- Debtor Account
- Debtor Reference
- Debtor Name
- Document Number
- Document Type
- Amount
- Balance
- Pending Action
- Purchase Order Number
What is this used for?
Ledger Item Search provides a detailed view of individual invoices, making it easy to locate and review specific items.
Step 3: Use Ledger Analysis
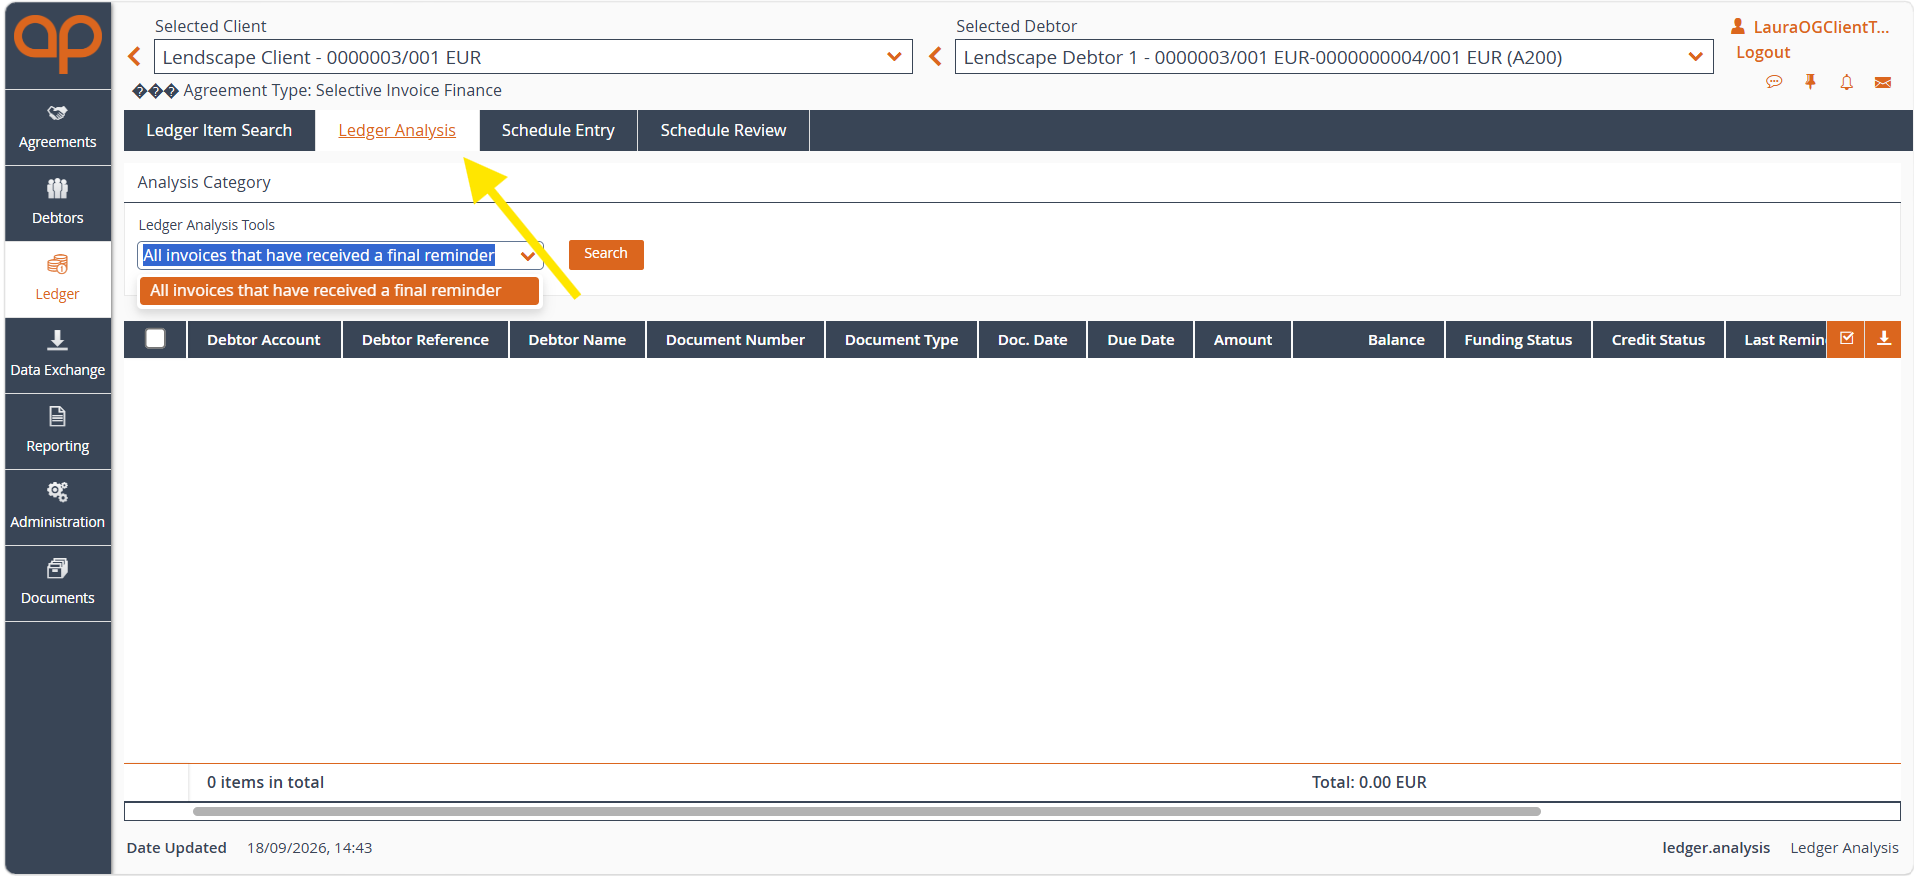
Select Ledger Analysis to review invoices that meet specific criteria.
The Analysis Category dropdown allows you to search for predefined groups of invoices, such as:
- Invoices that have received reminders
- Overdue invoices
- Disputed invoices
- Funding disapproved invoices
- Other available analysis categories
After selecting a category, click Search to display matching results.
What is this used for?
Ledger Analysis helps you quickly identify invoices requiring attention without manually searching through the ledger.
Step 4: Create a Schedule Entry
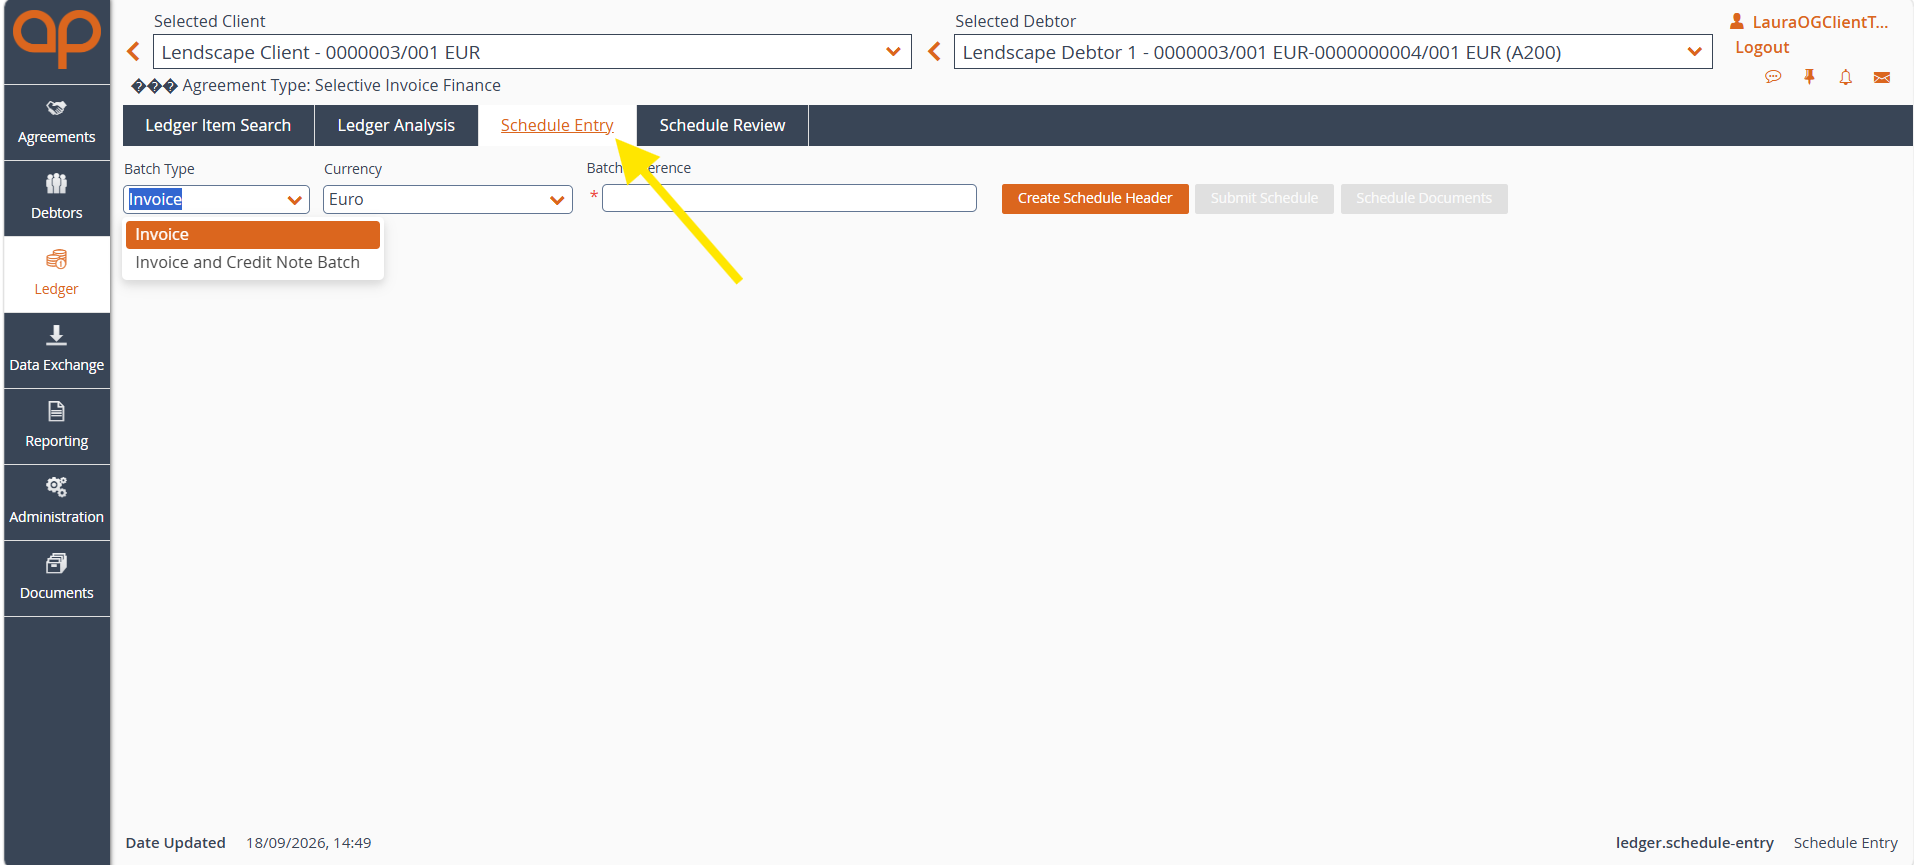
Select Schedule Entry to create and submit invoice batches.
Before creating a batch, choose Invoice from the dropdown menu. NOTE: Invoice and Credit Note Batch and Credit Note are not to be selected.
You will also need to provide the details on the entry form and upload any supplorting documents e.g. Invoice copy, verification documents if applicable.:
Once completed, select Create Schedule Header to begin the submission process. For more detailed steps, review this article.
What is this used for?
Schedule Entry allows clients to prepare and submit invoice data for processing and funding.
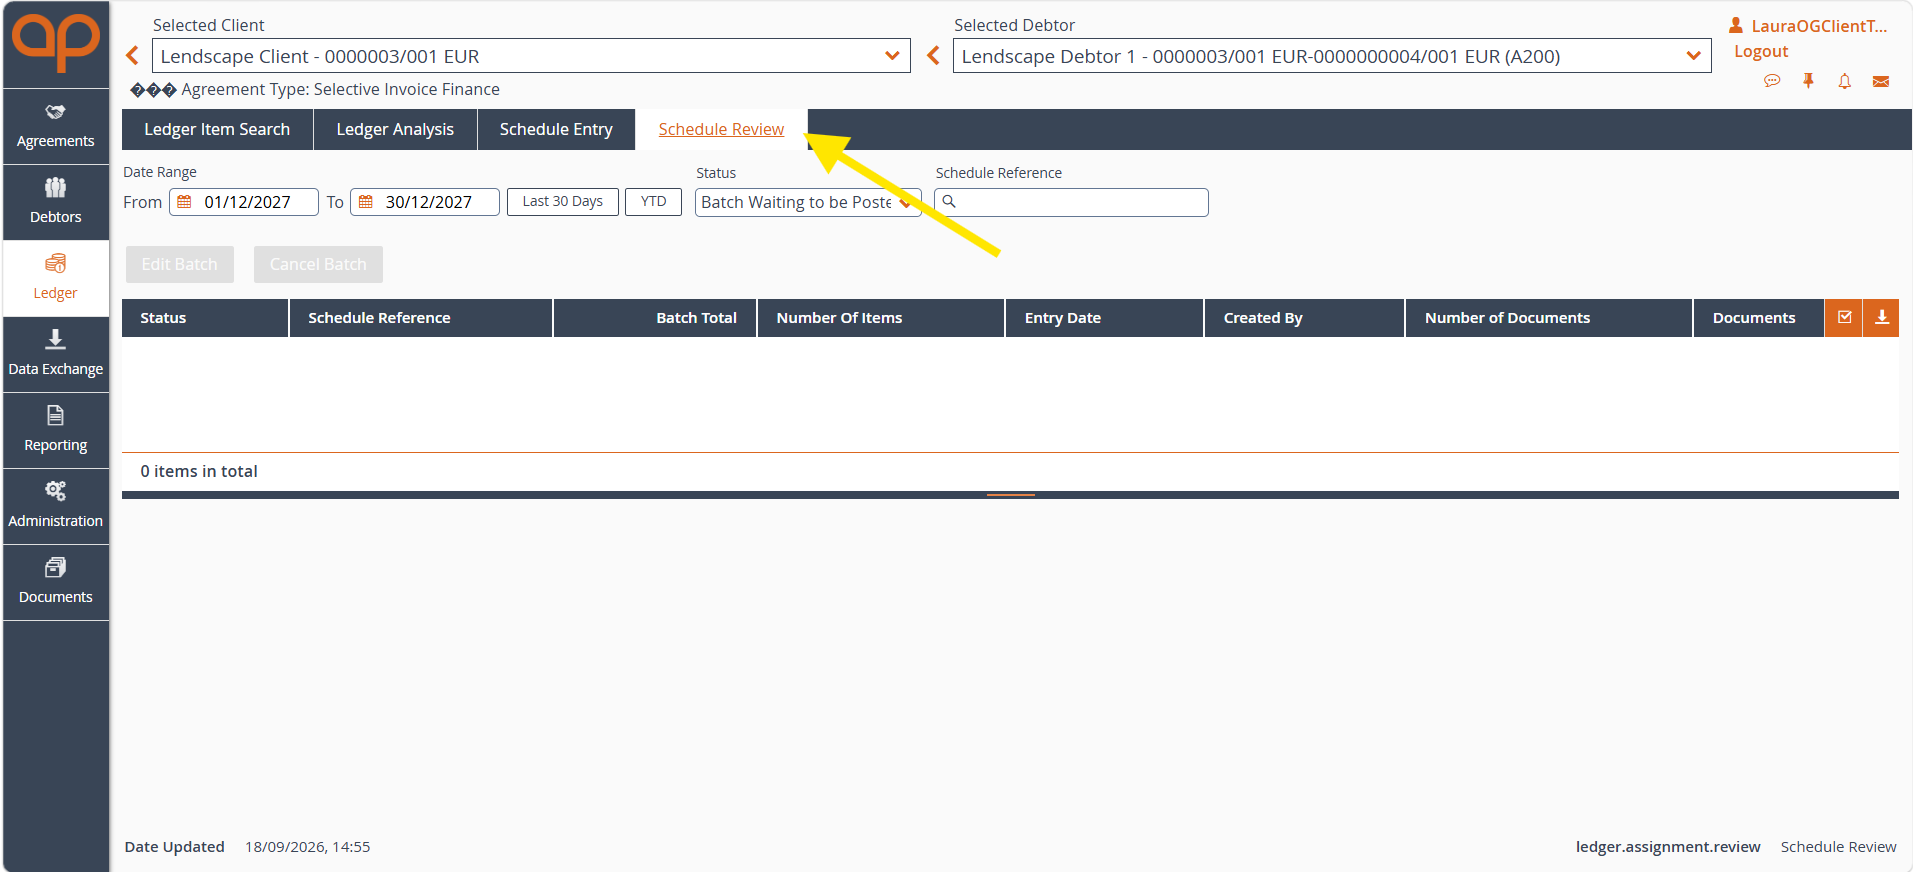
Step 5: Review submitted schedules
Select Schedule Review to monitor previously created invoice batches.
This page allows you to view:
- Batch status
- Schedule reference
- Batch total
- Number of items
- Entry date
- Creator
- Number of documents
Use the available date and status filters to locate specific schedules.
Common schedule statuses may include:
- Batch Waiting to be Posted
- Submitted
- Processed
- Other system statuses
What is this used for?
Schedule Review provides visibility of submitted schedules and allows you to track progress through the processing lifecycle.
Was this article helpful?
That’s Great!
Thank you for your feedback
Sorry! We couldn't be helpful
Thank you for your feedback
Feedback sent
We appreciate your effort and will try to fix the article