This guide explains how to upload one or more invoices through the Halo Client Portal.
Step 1: Navigate to Schedule Entry
- Log in to the Halo Client Portal.
- From the left-hand navigation menu, select Ledger.
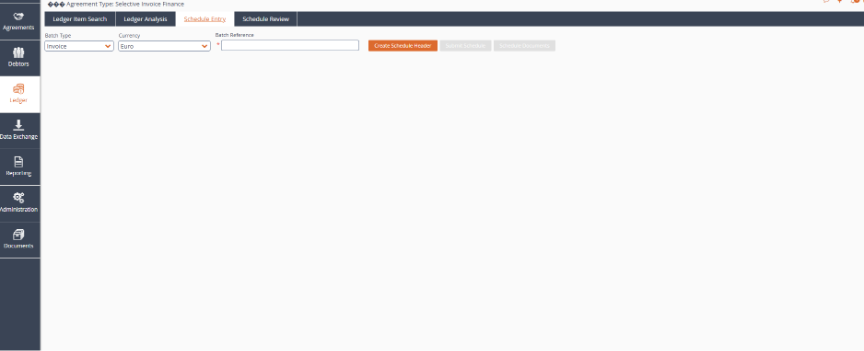
- At the top of the page, click the Schedule Entry tab.
Step 2: Create a Schedule Header
Complete the following fields:
- Batch Type: Select Invoice.
- Currency: Select the appropriate currency.
- Batch Reference: Enter a reference for your upload batch. Example: ABC 01
You may use any batch reference that suits your internal process. For example, the first three letters of your company name followed by a sequential number.
Once all fields have been completed, click Create Schedule Header.

Step 3: Enter Invoice Details
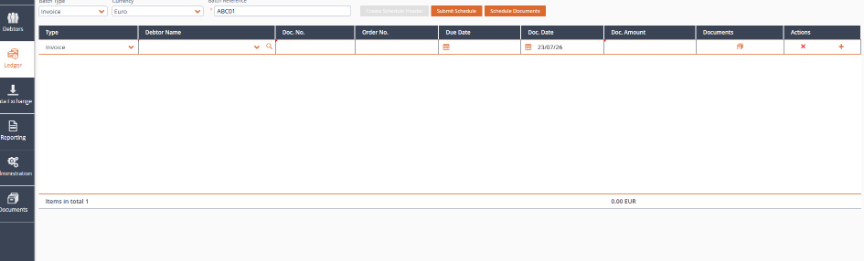
A table will appear for entering invoice information.
- Debtor Name – Select the debtor from the drop-down list.
- Document Number – Enter the invoice number.
- Order Number – Optional. Enter the purchase order number if applicable.
- Due Date – Enter the invoice due date.
- Document Date – Enter the invoice date.
- Document Amount – Enter the total invoice amount.
Step 4: Upload Supporting Documents
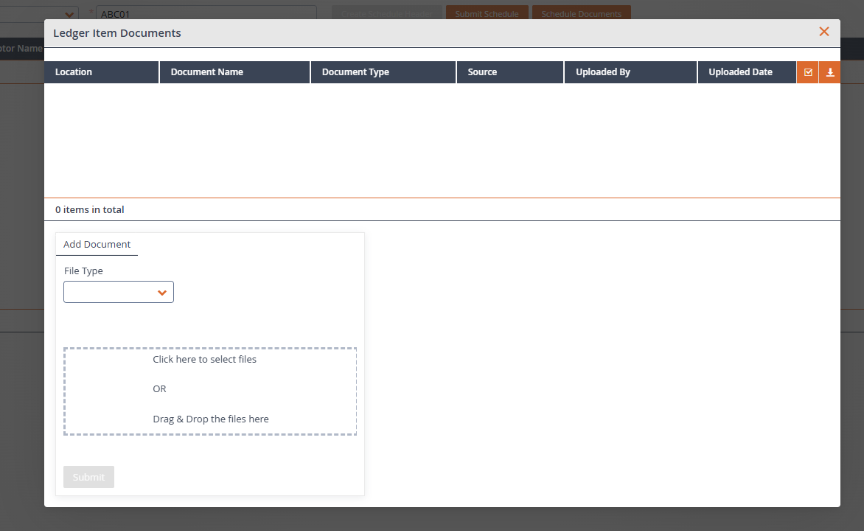
- Click the Documents button for the invoice.
- Upload the invoice document.
- You may also upload any additional supporting documents if required.
Step 5: Add Additional Invoices
To upload multiple invoices within the same batch, continue entering each invoice as a new row and upload the corresponding documents.
Step 6: Submit the Schedule
Once all invoice details have been entered and the required documents have been uploaded, click Submit Schedule to submit the batch for processing.
Was this article helpful?
That’s Great!
Thank you for your feedback
Sorry! We couldn't be helpful
Thank you for your feedback
Feedback sent
We appreciate your effort and will try to fix the article